I built this type of weather station before. But unlike the last times, when I blogged only after I completed it, this time I will blog during building it. I do not spend too much time on this. Still working from home I often lack the energy going back to my desk in the evening and writing code or designing stuff. So I spend about 30 minutes each day, making this a slow build. But hey, even when working slowly I will complete this.
This is the fourth version of my outdoor weather station. The following hardware concecpts I tried so far:
- Battery and solar powered ESP8266. Using Wifi for data transmission which uses way to much power. In summer time it worked, but in winter I only had about two hours of data.
- Battery (two standard AAs) and solar powered Arduino MKRWAN 1300. Using LoRaWan for transmission this one worked fine for about two years, then it stopped working for whatever reason. Code can still be found here.
- LiPo battery and solar (4 small panels) powered Adafruit LoRaWan Feather M0 – this one is so good I built it twice. The original one still works without touching for more than two years now. The second one also works fine. Some details I already blogged, the code is here.
For this version I decided to try a new microcontroller board – the Heltec Cubecell Board (they have a number of boards available, just check). This board is a makers dream:
- LiPo battery connector, solar panel input, built in charger
- RGB Led if you want to display status in different colors
- Open source software and deep sleep code which actually works
And this feature neither Arduino nor Adafruit has:
- Power output pin to power sensors and periphery which you can turn off by software.
On other boards you can power down the board, if you are lucky the memory stays powered and you do not have to re-connect to the LoRa network, but your sensors are constantly drawing current. With the Cubecell Vext connector, you can power down your sensors when the board goes into deep sleep and power them up again when it awakes. Of course some sensors need re-initialization after that but it still is way more energy efficient then keeping them running.
Ok, lets to back to building a weather station. This blog entry follows my process and does not immediately present the finished product. So my first steps are:
- Assemble the hardware
- Write the code
- Test the setup
Assemble the hardware
On hardware you need:
- Microcontroller. I decided for the Heltec Cubecell HTCC-AB01. Cost about EUR 15.
- Sensors. I want to measure temperature, humidity, light, atmospheric pressure and beginning of rainfall. So I decided for:
- BMP280 – combined sensor. I2C bus. Cost about EUR 3.
- GY49 – light level sensor, but any light sensor with I2C output will do. Cost also below EUR 3.
- ADSL1115 – analog digital converter. Not in the picture as I added it later. Some microcontrollers have A/D inputs, Cubecell also has one but it is used for checking the battery level.
- Battery. Any LiPo battery which brings the system over the night in winter. Rather over-provision, larger LiPos are not more expensive just a little more bulky. I am using a 1000mAh one here. Cost about EUR 7.
- Solar panel. Larger means faster charging. Output should be around 6V. Cost about EUR 8.
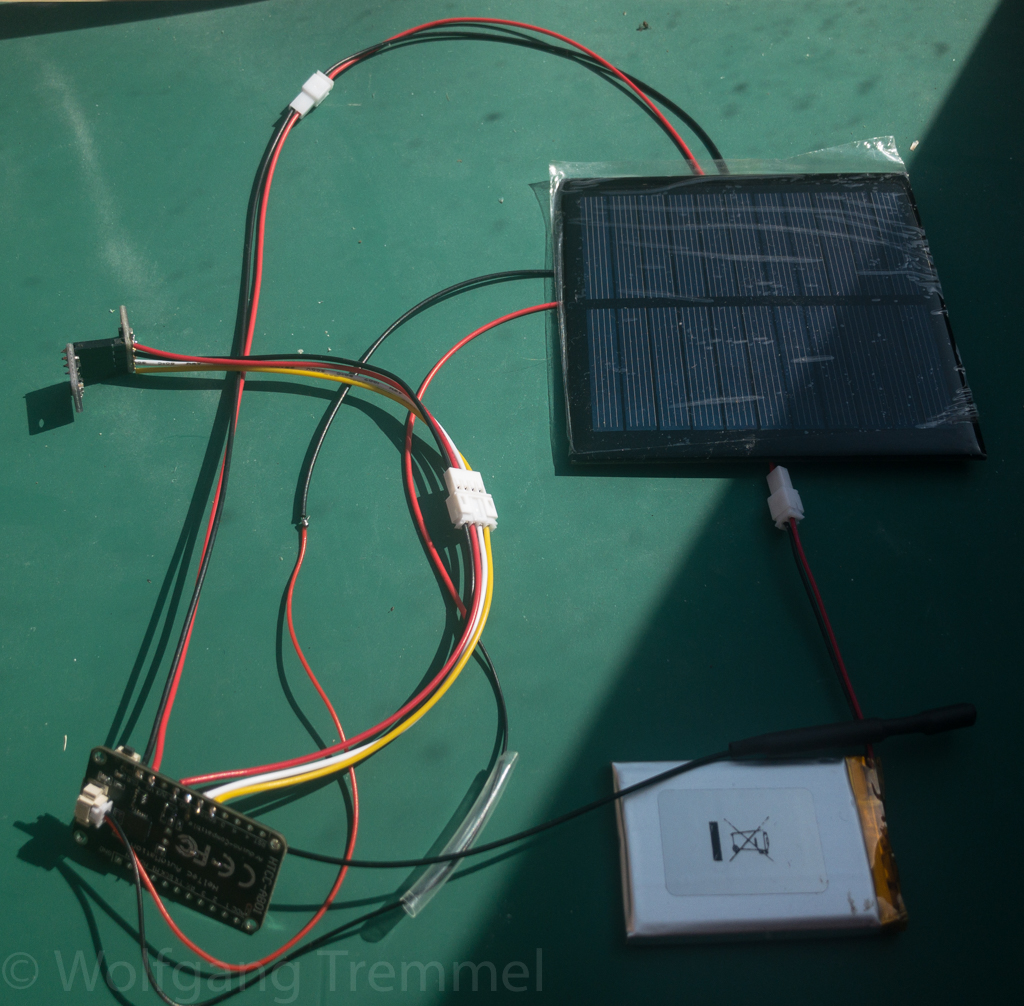
For trial I just put everything together with cables and connectors. Even in the finished product I avoid soldering if I can, because if something gets wet or wears out, plugging in a new part is way easier then to re-solder. You can see my setup in the picture above.
Connect all sensors via I2C bus and connect power to the Vext pin of the controller. Solar panel goes to V* and the battery to the battery connector on the back. Next is uploading software and testing.
Create the software
If you start from scratch this is the hardest part. But I built LoRa based weather stations before so I could re-use a lot of my code. The only thing Heltec (as everybody) does differently is the LoRa part of the code. Fortunately they provide many examples in their Github repository.
You can check my code also at Github. The idea of the software is very easy:
- Boot.
- Connect via LoRa to TheThingsNetwork.
- Power up sensors
- Check sensors
- Read sensors
- Read LoRa for commands (I defined a number of commands I can send to the station, like switching on the LED)
- Power down sensors
- Go to deep sleep for 2-4 minutes (this depends on battery, solar level, etc.)
- Go to step 3
I mentioned TheThingsNetwork – this is a commercial LoRa network provider who also have a community edition. I operate a gatewayat home and can use all other gateways of the network for free.
So this is now sitting near a window and transmitting data. Next step will be building a 3D printed case for it.